Introduction to CRaSH: The Cache Visualization Use Case
This post is an adaptation of an article originally written and published in French by Rieu Damien.
CRaSH: A shell to extend the Java Platform
CRaSH is an open source project created by Julien Viet (co-president of the Marseille JUG). I discovered CRaSH at a session of the Marseille JUG and I now contribute to its development.
This article introduces CRaSH through a case study and shows how you can easily work directly in the heart of the JVM. Have a good CRaSH!
I. Introduction
CRaSH can connect to a JVM in shell mode and execute commands directly on the JVM. Thus, we’ll be able to access a number of predefined commands (such as thread, jdbc and java). If you want a quick overview of the available commands and their uses, they are available for testing on the CRaSH demo site.
One of the great strengths of CRaSH is that we can also define our own shell commands by programming them. It is then possible to carry out commands specific to our needs!
In this tutorial, we will present CRaSH through a use case. For this, we will create a CRaSH command to display a cache, then we will integrate this control into our application.
We’ll then see how to use this command with CRaSH.
The demo application was made with Spring. In this article, we’ll show how easy it is to integrate CRaSH into a Spring application.
II. Prerequisites and Installation
II-A. Prerequisites
- JBoss 7.1.1
- Maven 3
- The app code can be found on GitHub: https://github.com/crashub/spring-ehcache-demo.
II-B. Installation
To install CRaSH, download the CRaSH archive (www.crashub.org) and decompress it. Installation is not required if you use the ssh or telnet mode.
II-C. Demo App Installation
- Download the source code of the app from GitHub: https://github.com/crashub/spring-ehcache-demo.
- Building the war file:
cd sandbox
mvn clean package
- Deployment in JBoss
Once the war file is built, you just copy it to the JBoss deployment directory ().
Warning: The demo app has been tested only on jboss-as-7.1.1.Final.
III. CRaSH Overview
Here is the official definition of CRaSH:
The Common Reusable SHell (CRaSH) deploys in a Java runtime and interacts with the JVM. Commands are written in Groovy and can be developed at runtime making extending the shell very easy with a fast development cycle.
In summary, CRaSH is deployed in a Java runtime and allows you to interact with the JVM. With CRaSH, we can access the JVM using a shell. We can execute commands to see threads and classes, connect to available data sources and execute queries as if we were in the same place as the application!
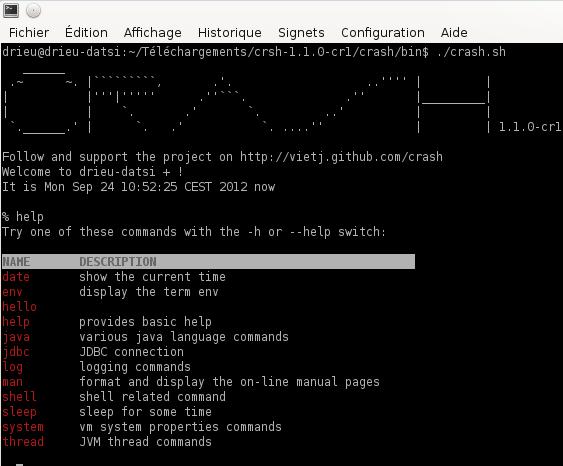
Here is a list of available commands:
These are the basic commands. However, a major strength of CRaSH is that you can make your own shell commands in Groovy (it doesn’t matter if you don’t know Groovy because Groovy recognizes Java syntax).
In our demo example, we will create a Groovy script that will read the information in the cache.
IV. Demo Application
IV-A. Objective
The objective is to control the demo application cache by connecting to the application JVM with CRaSH and run a display cache script.
We will follow these steps:
- Create a script to display the cache: .
- Integrate CRaSH into our demo application (adding Maven dependencies, and configuration files).
- Package and deploy our demo app on JBoss.
- Use CRaSH.
IV-B. Demo Application Overview
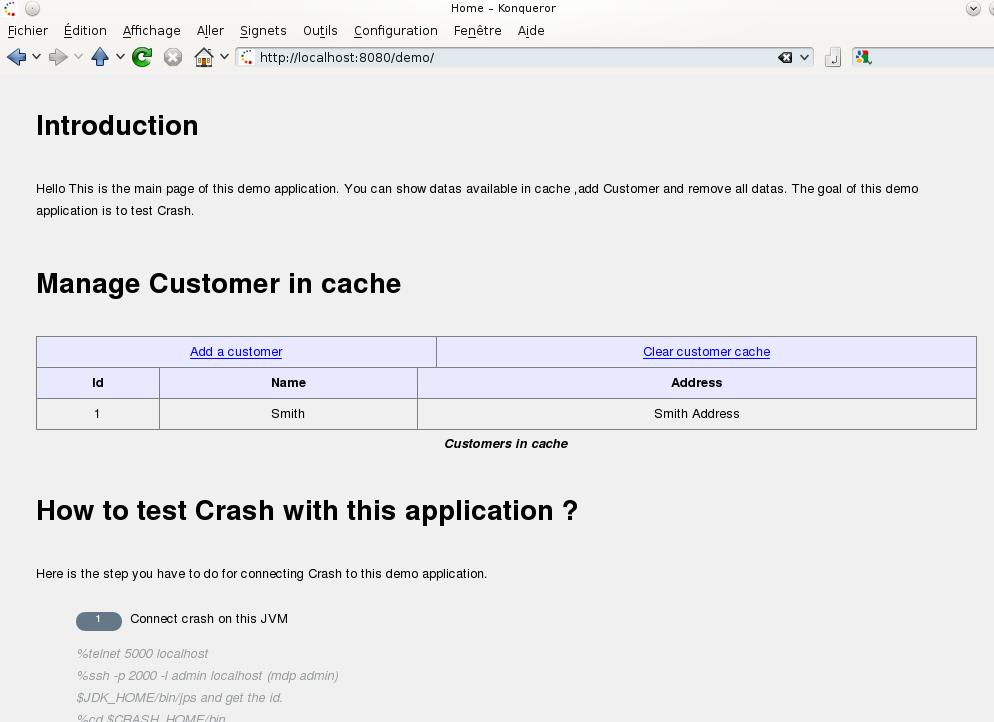
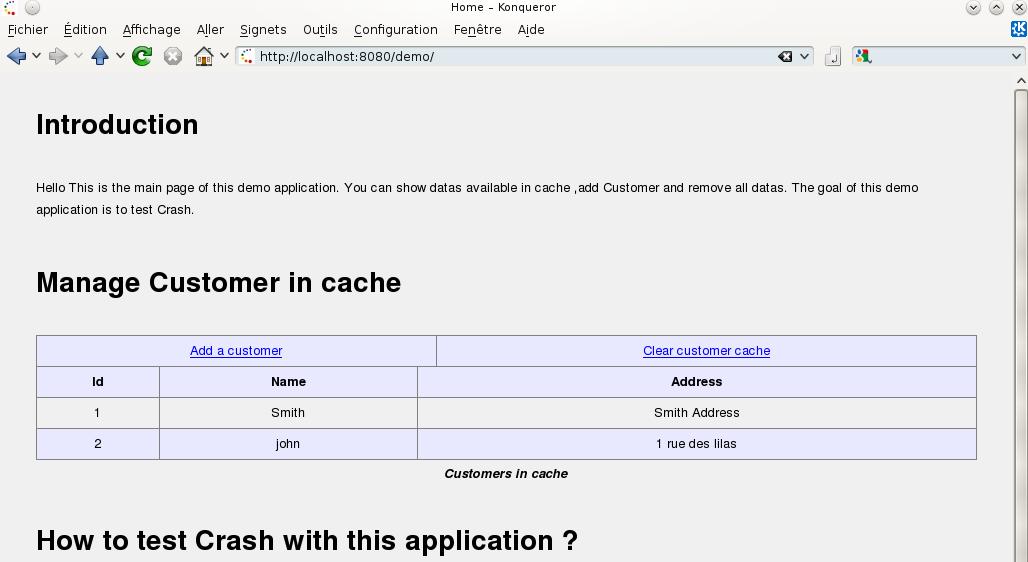
The demo application is very simple. You can use it to list, add and delete users. To access the demo application, simply go to :
IV-C. Creating a Display Cache Script: spring_cache.groovy
To display the data in our cache, we need a script. This script will be placed in the directory of our demo application.
Note: In this version ( 1.1), it is mandatory to add scripts in the directory.
IV-C-1. How does this script works?
This script retrieves the bean that exists in the environment. It is then possible to retrieve the list of customers by calling the method of the bean:
Then the script loops through the list of customers and displays their details.
IV-C-2. The Display Cache Script
This script will define a CRaSH command, which will be available in shell mode:
- The command name is the name of the Groovy class. In our case, this is .
- This command may have several sub-commands. In our case, we defined the subcommand .
So to call , simply type in the CRaSH shell:
%spring_cache showCache
Here is the code of the command:
package crash.commands.base
import org.crsh.command.CRaSHCommand
import org.crsh.cmdline.annotations.Usage
import org.crsh.cmdline.annotations.Command
import org.crsh.cmdline.annotations.Argument

import org.crsh.cmdline.annotations.Required
import org.crsh.shell.ui.UIBuilder

import fr.dr.sandbox.controller.Customer;
import fr.dr.sandbox.controller.CustomerComponent;
import java.lang.reflect.Method;
import java.util.List;

/**
* Spring commands to list Customer in cache for the demo application.
* @author drieu
*
*/
@Usage("Spring cache commands")
@Command
class spring_cache extends CRaSHCommand {

 @Usage("Show values that are loaded in cache")
 @Command
 public void showCache() {
   def bean = context.attributes.beans["customerComponent"];
   if (null != bean) {
     out.println("Cache contents :");
     List<Customer> lst = bean.getCache();
     if (null != lst) {
     for(Customer c : lst) {
         out.println("Name:" + c.getName());
         out.println("Id:" + c.getId());
         c.show();
    }
  }
 }
 }
}
See Appendix V.E for more details on how to create a command. This command is written in Groovy. However, the syntax we are using here is the same as Java.
IV-C-3. Integrating CRaSH into our Demo App
Integrating CRaSH into an application is very simple:
- Add the CRaSH Maven dependency.
- Add a configuration bean.
- Add the script already created.
- Package everything into a war file.
For this script to be available, it should be placed in . Of course you can create as many scripts as you want and put them in this directory.
In some cases, it is possible to edit, delete or add commands dynamically. The command is then automatically reloaded!
IV-C-4. Adding Maven Dependencies
In your :
<dependency>
    <groupId>org.crsh</groupId>
       <artifactId>crsh.shell.embed.spring</artifactId>
       <version>1.1.0</version>
</dependency>
<dependency>
   <groupId>org.crsh</groupId>
   <artifactId>crsh.shell.core</artifactId>
   <version>1.1.0</version>
</dependency>
<dependency>
   <groupId>org.crsh</groupId>
   <artifactId>crsh.shell.packaging</artifactId>
   <version>1.1.0</version>
   <type>war</type>
   <classifier>spring</classifier>
</dependency>
Warning: CRaSH uses the Spring 3.1.1.RELEASE version but it should work with all versions of Spring.
IV-C-5. Configuration of the CRaSH Access Modes
This step is optional because you can connect directly to the JVM (see the appendix on connection modes).
On the other hand, if you want to use ssh or telnet modes, you only need to modify a bean (see the file of the demo application).
In the example below, we configure Telnet access through port 5000 and we also add an ssh connection on port 2000 with the admin user.
Example:
<bean class="org.crsh.spring.SpringWebBootstrap">
	<property name="config">
		<props>
			<prop key="crash.telnet.port">5000</prop>
			<!-- VFS configuration -->
			<prop key="crash.vfs.refresh_period">1</prop>
			<!-- SSH configuration -->
			<prop key="crash.ssh.port">2000</prop>
			<!-- Authentication configuration -->
			<prop key="crash.auth">simple</prop>
			<prop key="crash.auth.simple.username">admin</prop>
			<prop key="crash.auth.simple.password">admin</prop>
		</props>
	</property>
</bean>
<bean class="org.crsh.telnet.TelnetPlugin"/>
We can connect to our application as follows:
telnet 5000 localhost
ssh -p 2000 -l admin localhost (mdp admin)
IV-C-6. Packaging and Deployment
You build the war file by:
mvn clean package
We then deploy this war file in JBoss. The application is then available at . In the following section, we will see how to use CRaSH.
IV-D. Using CRaSH
Using CRaSH is very simple. There are several ways to connect to a JVM:
- ssh mode
- telnet mode
- Attach mode
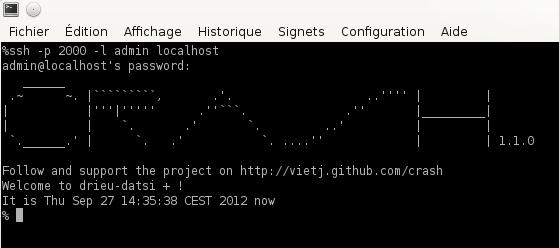
In our example, we will use the ssh mode. Since CRaSH is embedded in the demo application with the ssh configuration (admin user and port 2000), you only need to have an ssh client to connect:
ssh -p 2000 -l admin localhost
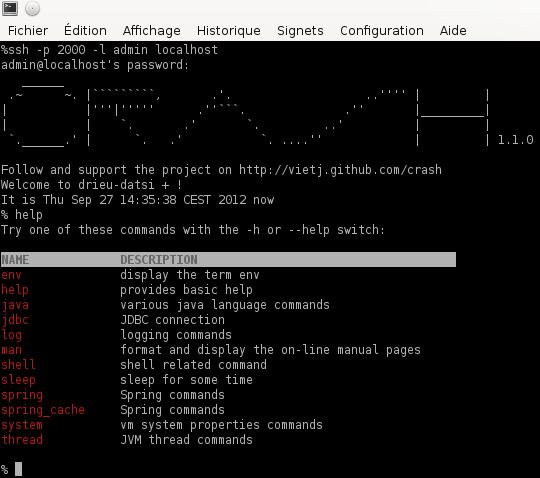
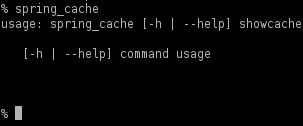
Once connected, you can type for a list of the available commands:
Notice that our command is listed. To get the help for this command, enter: .
To use this command, just type: . This command displays a list of the customers in our cache.
At startup, we loaded a user into our cache (see the appendix):
% spring_cache showcache
Cache contents :
Name:Smith
Id:1
We can add another user into our cache, just click on “Add customer” on .
If we return to the home page after adding the customer, we will see two lines in our table:
Then, if we return to our shell, we see that the cache has been updated:
% spring_cache showcache
Cache contents :
Name:Smith
Id:1
Name:john
Id:2
V. Appendices
V-A. Functioning of the Demo Application Cache
This section describes how we implemented cache management in the demo app for the following cases:
- at startup
- in the application
We use ehcache 1.6.1 with Spring 3.1.1.RELEASE in our demo application.
For this, we define a cacheManager with Spring in the file:
<ehcache:annotation-driven cache-manager="cacheManager" />
We then use the cacheManager in our application to perform read, write and erase operations. We access the cache in two ways:
- at startup
- through the web interface
V-B. Cache Loading at Startup
We will put a customer into the cache at startup. We defined a listener in our file:
<listener-class>
fr.dr.sandbox.listener.CacheListener
</listener-class>
This listener contains a context-initialized method into which we put our code for loading a customer into the cache.
CacheManager cacheManager = (CacheManager) WebApplicationContextUtils.getWebApplicationContext(servletContext).getBean("cacheManager");
Cache cache = cacheManager.getCache("customer");
Customer c = new Customer();
c.setId("1");
c.setName("Smith");
c.setAddress("Smith Address");
cache.put(new Element(c.getId(),c));
After application startup, there is a log of this loading:
14:53:32,044 INFO  [fr.dr.sandbox.listener.CacheListener] (MSC service thread 1-2) ========> contextInitialized() : BEGIN.
14:53:32,047 INFO  [fr.dr.sandbox.listener.CacheListener] (MSC service thread 1-2) ========> contextInitialized() : Customer Smith was added in cache.
14:53:32,047 INFO  [fr.dr.sandbox.listener.CacheListener] (MSC service thread 1-2) ========> contextInitialized() : END
V-C. Accessing the Cache via the Web Interface
It is possible to perform cache operations via the web interface. We define operations in the Controller that will call the caching methods that are in CustomerComponent.
Example:
Accessing will call the following Controller method:
/**
* Clear all data in cache.
* @return String text message OK or KO.
*/
@RequestMapping(value = "/clearCache", method = { RequestMethod.GET })
@ResponseStatus(HttpStatus.OK)
public @ResponseBody
String clearCache() {
	customerComponent.clearCache();
	return "Cache successfully Cleaned";
}
V-D. Connection Modes
CRaSH provides several options for connecting to JVMs. Here we’ll present the different methods.
V-D-1. Standalone Mode
This mode allows you to start CRaSH directly from the shell:
%cd $CRASH_HOME/bin
%crash.sh
This starts CRaSH with its own JVM.
V-D-2. Attach Mode
This mode is used to connect CRaSH to a local JVM. For a list of available local JVMs, use the jps command in the JDK:
%$JDK_HOME/bin/jps
3165 RemoteMavenServer
20650 Test
20651 Jps
To connect, simply pass the JVM PID to CRaSH:
%cd $CRASH_HOME/bin
%crash.sh 20650
V-D-3. Embedded Mode
CRaSH can be embedded in a web application deployed on an application server. This is the case for our demo application.
V-D-4. Other Modes
CRaSH also comes in the form of a war file, which is deployed on an application server. Thus, we can access the application server’s JVM and can for example connect to available data sources and execute queries.
There are several methods for connecting to CRaSH deployed on an application server:
- ssh mode
- telnet mode
- attach mode
V-E. Creating a CRaSH Command
There are two ways to create a command:
- 1. As a script
In this case, put the code into the Groovy script. Here is an example of a clock command:
package crash.commands.base
for (int i = 0;i < 10;i++) {
	out.cls();
	out << "Time is" + i + "\n";
	out.flush();
	Thread.sleep(1000);
}- 2. As a class
This method greatly simplifies the creation of commands. In this section, we present only the basic annotations needed to create a command. There are many possibilities for CRaSH commands. You can, for example, add completion and create result tables.
For more information, check the document on www.crashub.org.
Here is a command structure:
@Usage("JDBC connection")
class jdbc extends CRaSHCommand {

  @Usage("connect to database with a JDBC connection string")
  @Command
  public String connect(
 ...
}: defines that a method or a class is a command.
: defines the help that will be displayed. If it is placed on top of the class that extends a command then this help will be displayed with the help command. In our case, when the help command is passed, we will have the following output with the annotation.
%help
Try on of the following commands with -h or --help switch:

NAME    DESCRIPTION
env     dipslay the term env
help    provides basic help
java    various java language commands
jdbc    JDBC connection
We can also place this annotation above a method identified as a command. For example, for the JDBC connect method, we have: . So if we input:
%jdbc help
We’ll get the following description:
The most commonly used jdbc commands are:
   props            show the database properties
   close            close the current connection
   table            describe the tables
   open             open a connection from JNDI bound datasource
   connect          connect to database with a JDBC connection string
   execute          execute SQL statement
   info             describe the database
   tables           describe the tables
There are also annotations to define the arguments (example: @Argument) and options, for example, .
VI. Conclusion and Acknowledgments
I hope you enjoyed this article and that you now want to use and learn more about CRaSH.
Thanks to Mickael BARON for his patience and the quality of his observations and Claude Leloup for his careful and diligent review. I also thank Julien Viet and Romain Linsolas for their reviews.
Thanks again to Damien Rieu for his great article. For more information and useful resources on how to use CRaSH with eXo Platform, head to the community website! You can also find the original article in French here.
