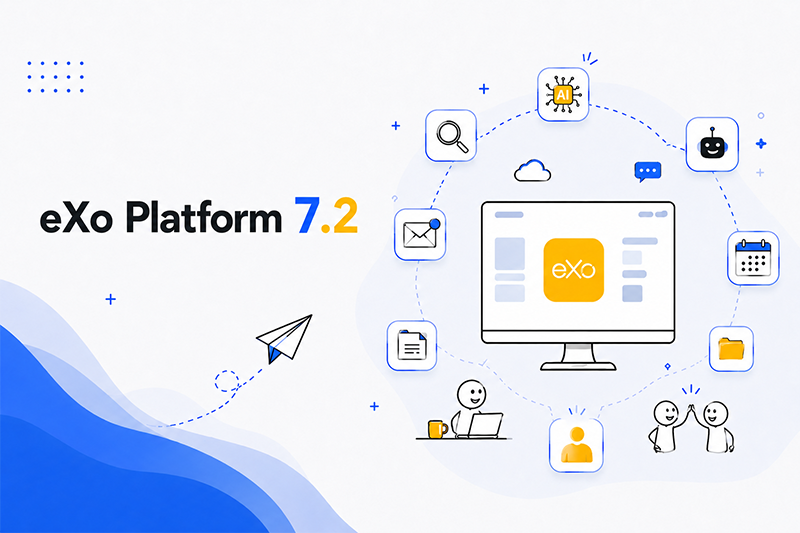
Digital Collaboration Software
Help Your Teams Connect, Collaborate and
Get Things Done
Get Things Done

eXo Platform used to have an administrative feature that span off to become its own thriving company: Codenvy, a modern cloud-based integrated development environment (IDE).
eXo is also a main contributor to Eclipse Che, an open source cloud IDE and the basis of Codenvy, used and contributed to by world-class IT companies including Samsung, IBM and SAP.
This geeky side has become part of eXo’s reputation. We love it and our customers get value from it and love us for it too.
However, in this article we are going to take things in the opposite direction – something we also like to do. We are stepping away from anything development to see just how far we can go in customising an eXo Platform site without ever touching a line of code.
The only prerequisite is being an eXo Platform admin. With that in mind, here are ten things you can do to make eXo Platform yours without custom development.
Select a Dark or Light navigation bar to show your logo at its best.
Some of our clients will even name their eXo Platform site. For example, a company called Acme may name it something like ‘AcmeConnect’ and have a logo that reflects that.
This branding feature is something we are currently working on with the intention of adding the ability to customise the skin of the platform without development. So keep an eye out for future updates.
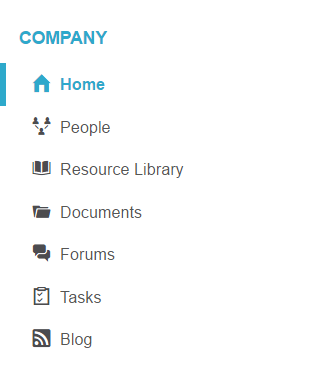
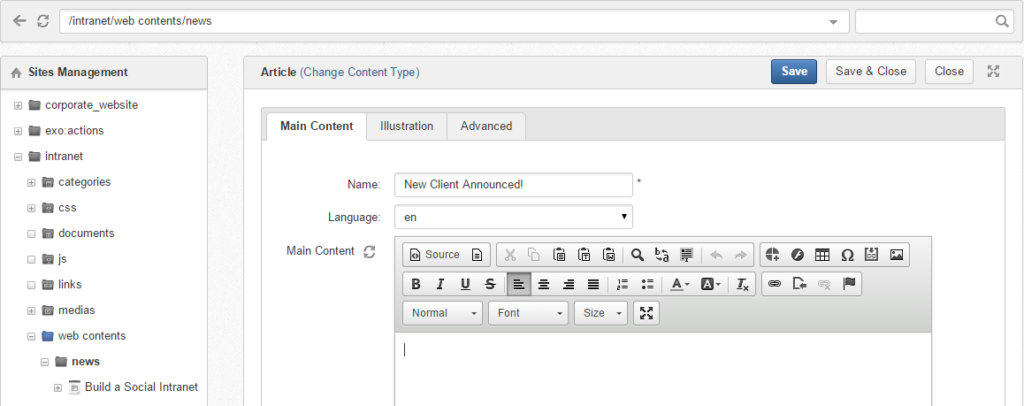
Let’s start with the site’s main navigation menu. This is the one you always see displayed at the top of the left panel.
In the top toolbar, click on the Edit button, then go to Site > Navigation. This opens up a Navigation Management window where you can add new links (or what we call ‘nodes’) to the menu, or edit/remove existing ones.
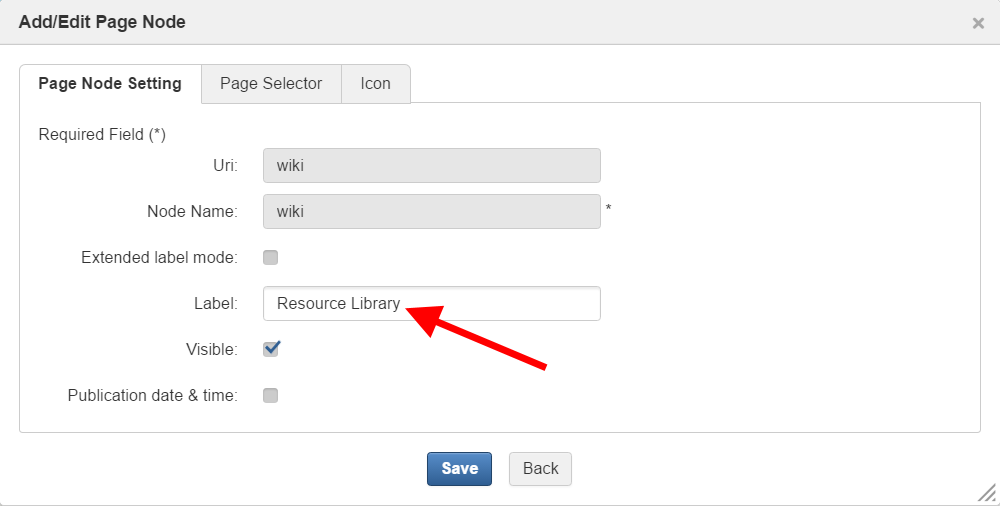
Suppose that we want to first change the name of the general Wiki app to something less generic that describes its use, for example, ‘Resource Library’. In the Navigation Management window, right-click on Wiki and then click on Edit this Node.
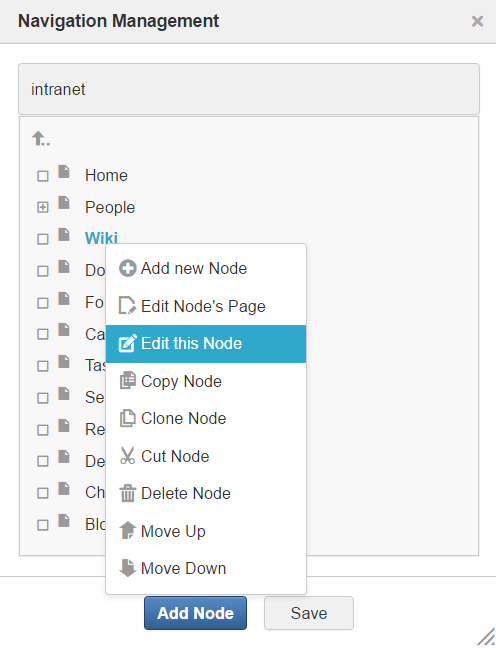
Notice that we can also make the link invisible to our users by unchecking the Visible box. In the Navigation Management window, we can also completely delete links that we don’t need by right-clicking on them and clicking on Delete Node. In this example, I will delete the Calendar link.
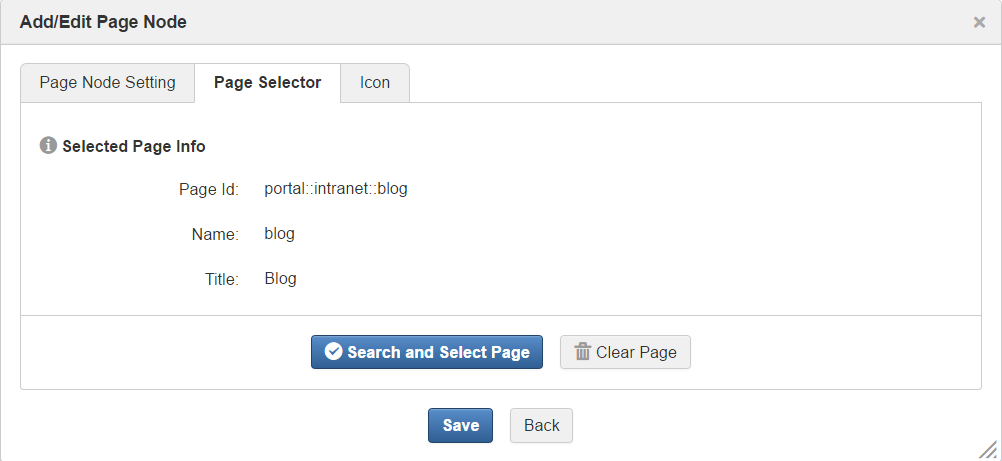
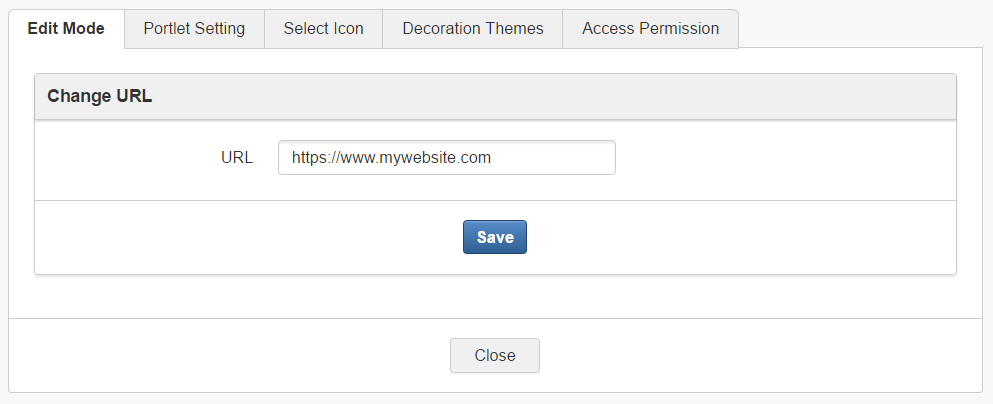
F inally, we can add a new navigation link using the Add Node button. This opens up a window where we can name our new node and point it to an existing page in our site, or to a new page that we can create here on the fly.
In this example, I have added a new node called ‘Blog’, switched to the Page Selector tab and created a new page also called ‘Blog’. Now every time a user clicks on the Blog link, it will take them to the Blog page.
Tip: If you restrict the access permissions of a page to a specific group of users (here is how you can do that), this will also restrict who can see its associated link on the navigation menu.
You can use this to create a navigation menu that displays links to users differently, based on their groups/roles.
You can manage the navigation menu displayed at the top of each space through an identical navigation management interface.
To access it, go to a space that you are managing, click on Space Settings and select the Navigation tab. This way each team or project can have a different custom navigation within their space managed by the space manager.

Types of Digital workplace solutions
The modern workplace has evolved significantly in recent years, with advancements in technology, the growing number of tools …
As you may already know, each user can receive on-site and email notifications and can change their personal notification settings.
The list of notifications covers different types of activity taking place inside the platform, such as activity related to my tasks, document collaboration, my social interactions and so on.
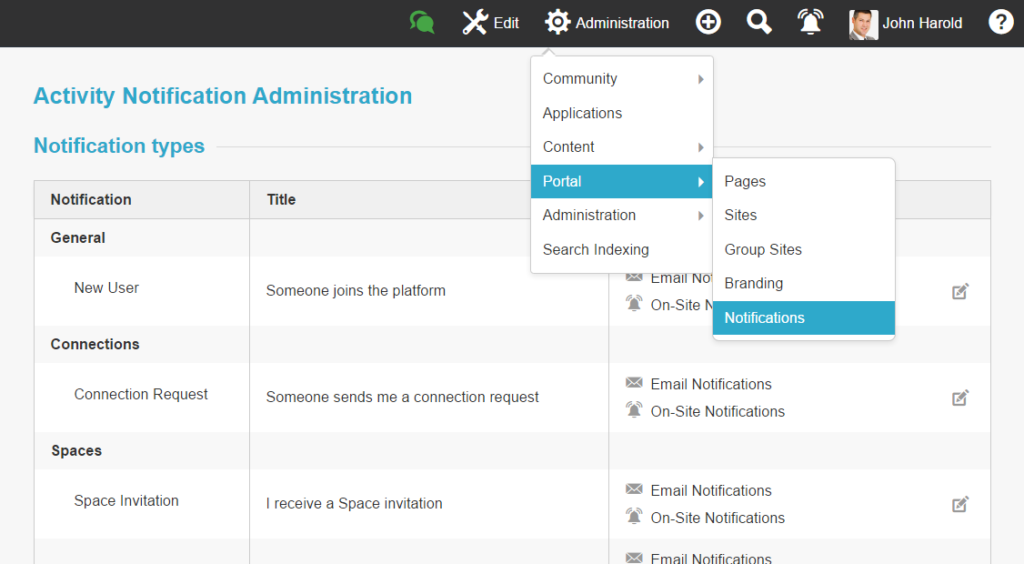
As an admin, you can easily control which apps (e.g. forums, document management, task management, Wiki, calendar, etc.) are available to your users. We saw an example of this in the context of the site’s navigation menu.
If you hide an app from your users, like the Tasks app, it would make sense to also hide its notification settings from everybody’s personal notification settings page.
You can do this by going to Administration > Portal > Notifications, then disabling the notification types that you want to hide for all users.

Admins can customise what is displayed on any page using a ‘what you see is what you get’ layout editor.
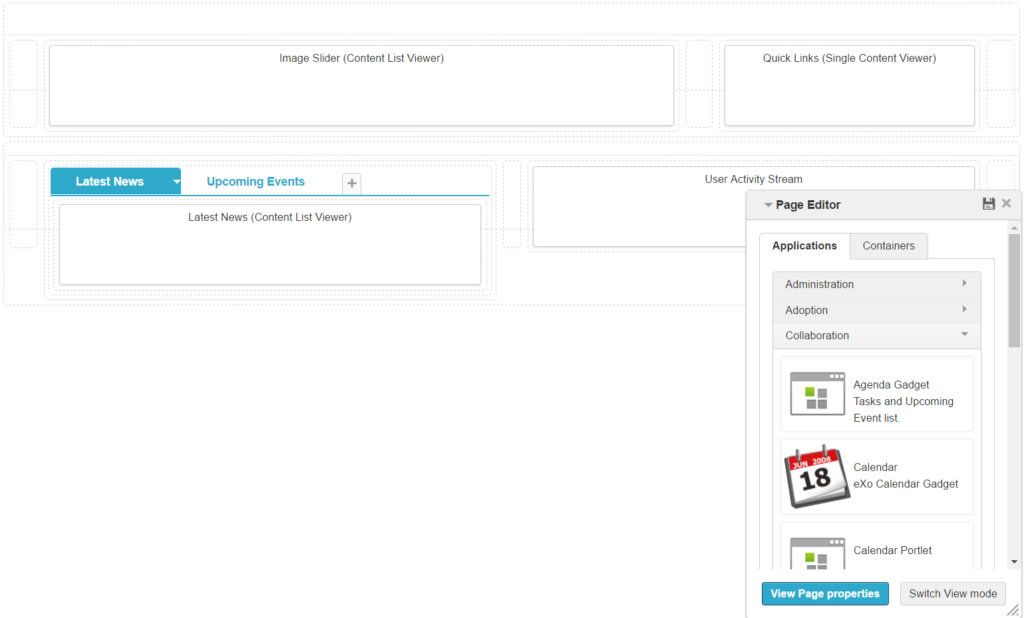
Let’s use the example of the site’s homepage. To edit the layout of this page, first go to the page as an admin, then from the top toolbar go to Edit > Page > Edit Layout. This opens up the layout editor.
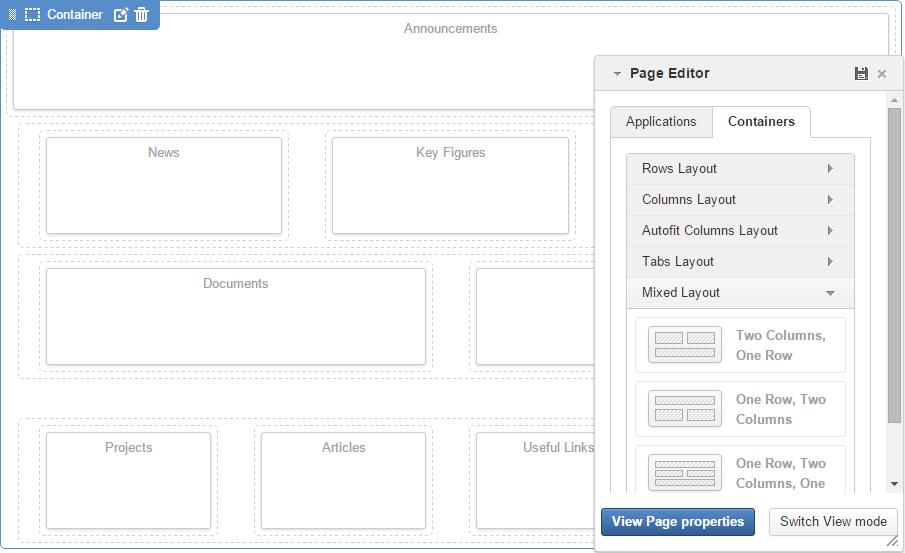
Here, you can see the different components of your page. You can manage apps (or what eXo often calls ‘portlets’, i.e. portal apps) by selecting the Applications tab. You can also manage containers (used to organise several apps in table-like structures within the same page) by selecting the Containers tab.
You can now start to add containers to your page and place apps inside them using drag and drop. Hovering over a container or app that you’ve added shows you buttons for editing them, deleting them from the page, or moving them around within the page (drag and drop).
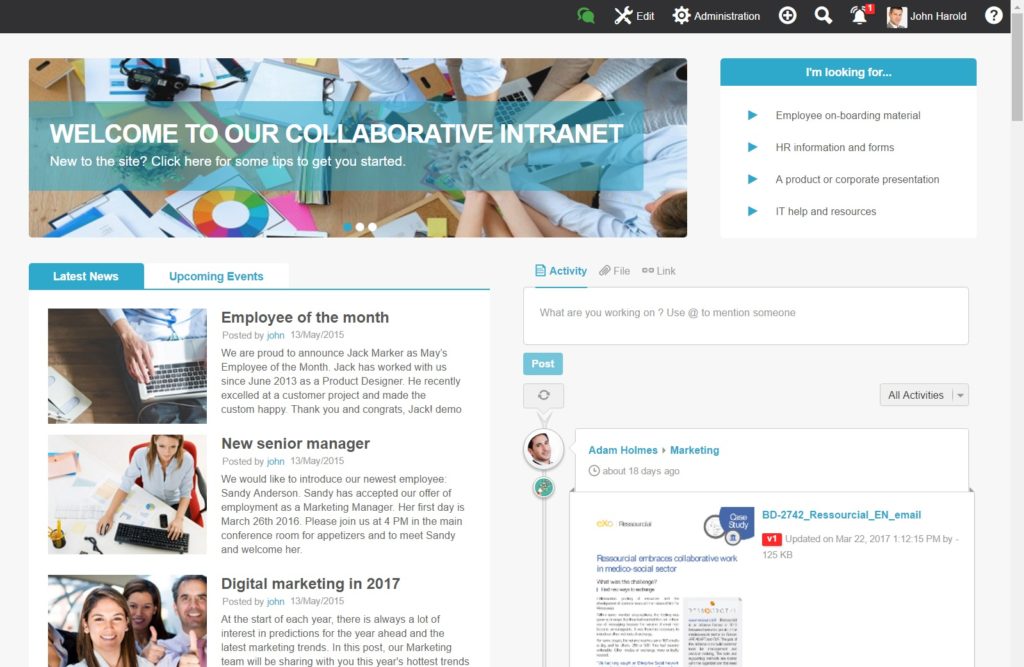
Here is a custom layout I made for my homepage in the layout editor:
Some of the apps (i.e. portlets) that you can add to pages using the layout editor are content apps (listed under the Content category). These include two apps that let you display web content on your page:
After adding these to your page, click on Edit to point them to the relevant content (or content folder) and a few other things (e.g. the display template in the case of Content List Viewer).
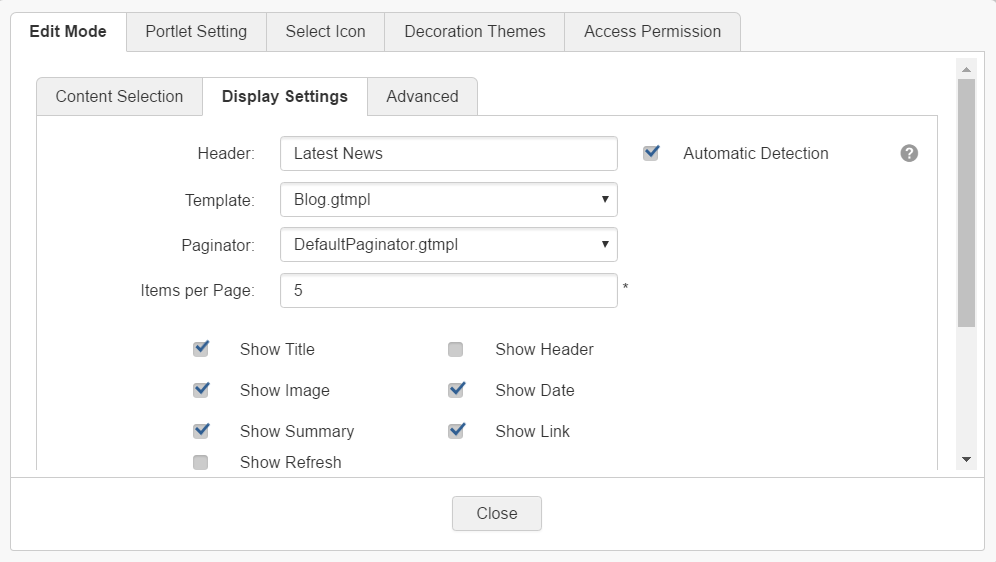
You do not need web development skills to create or edit the web content because a rich editor is provided as the default. However, if you want to edit the HTML source code you can access this by clicking on the Source button.
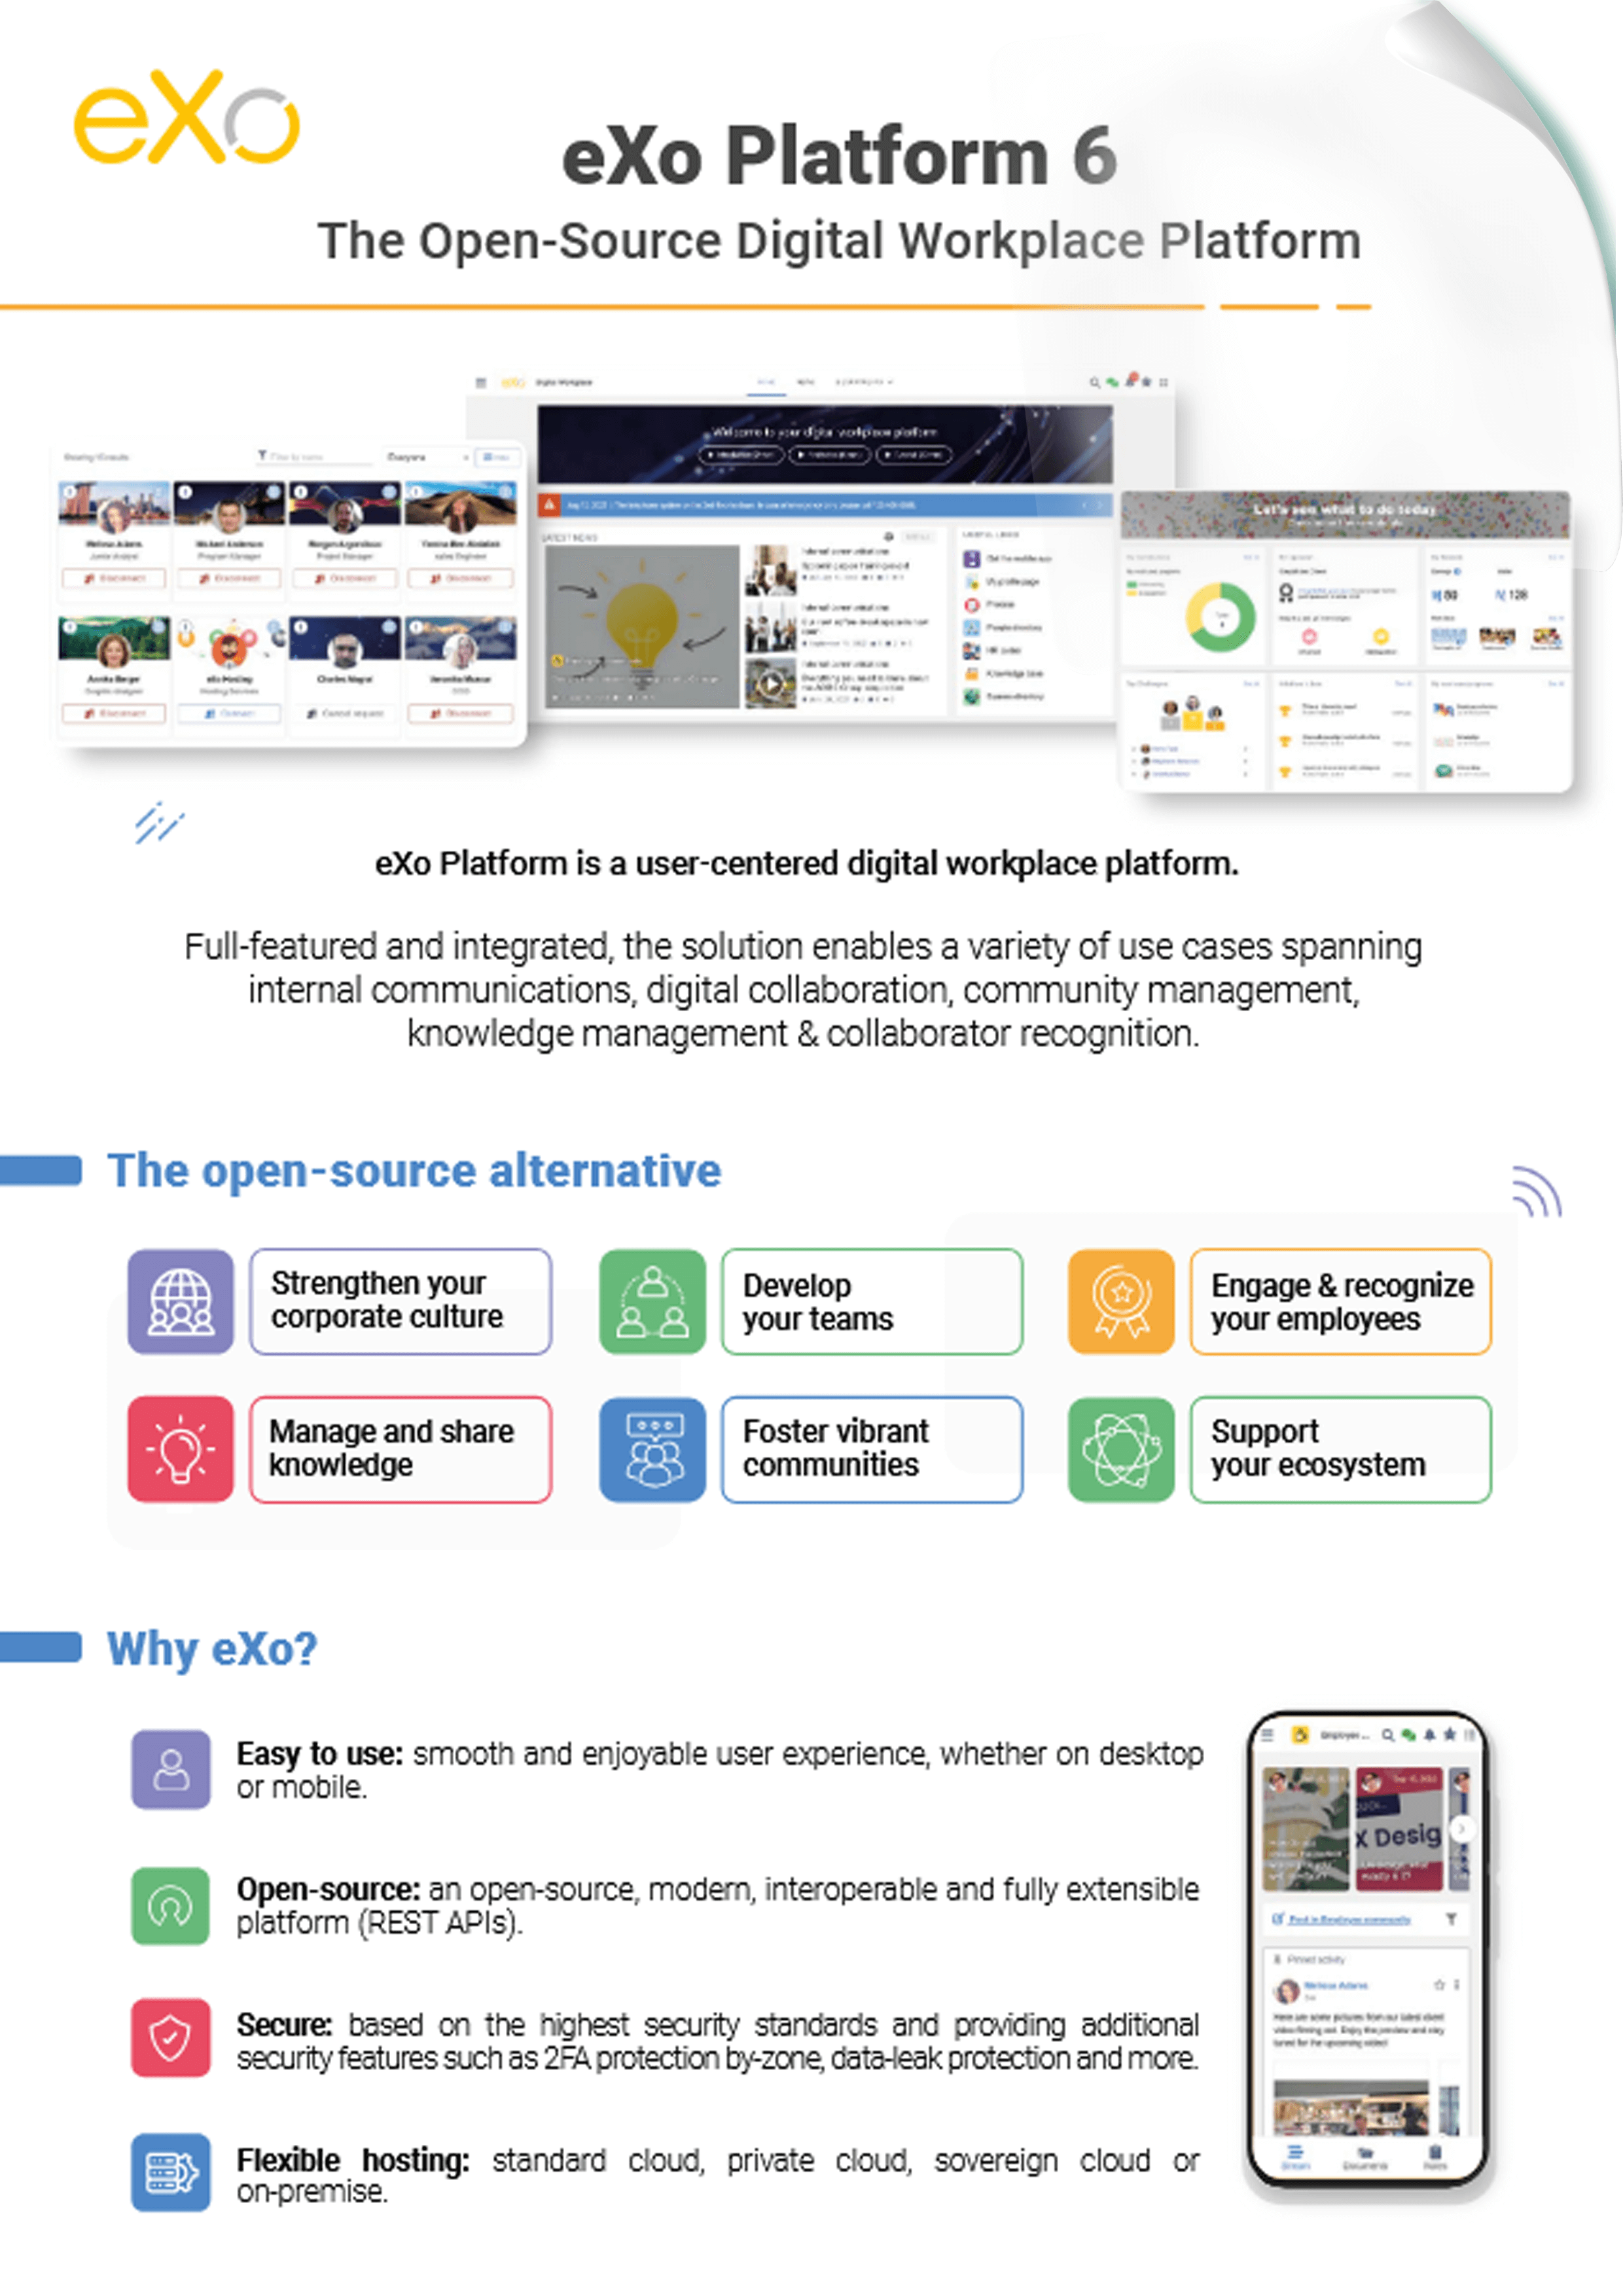
eXo Platform 6 : The Open-Source
Digital Workplace Platform
Download the eXo Platform 6 Datasheet and discover all the features and benefits


Download the eXo Platform 6 Datasheet and discover all the features and benefits
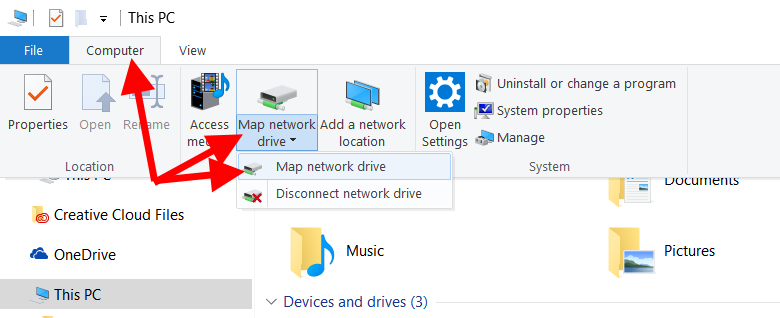
This is something that any user can do, not just admins. You can map a drive or folder within the Documents app in eXo Platform (e.g. the personal documents area or a team space’s document repository) as a network drive on your computer. This lets you browse and manage eXo Platform documents as if they were stored on your computer.
In eXo Platform, go to the Documents app (personal or from within a space), right-click on the directory/folder you want to map and click on Copy URL to Clipboard.
In Windows, go to This PC > Computer > Map Network Drive > Map Network Drive
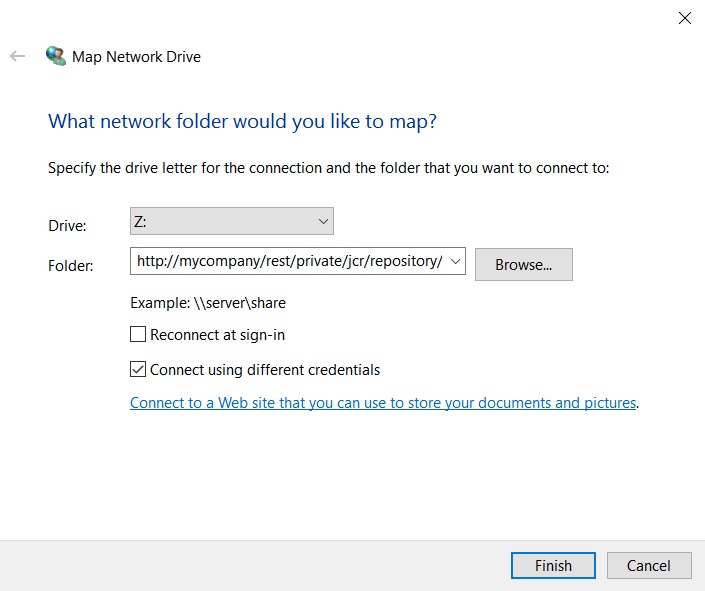
Click on Finish. You will be prompted for your eXo Platform credentials. Enter them and you are good to go.
If you are using a Mac or Linux machine, I am sure there is a similar procedure. Just google how to map a network drive in your operating system if you do not already know how to do it.
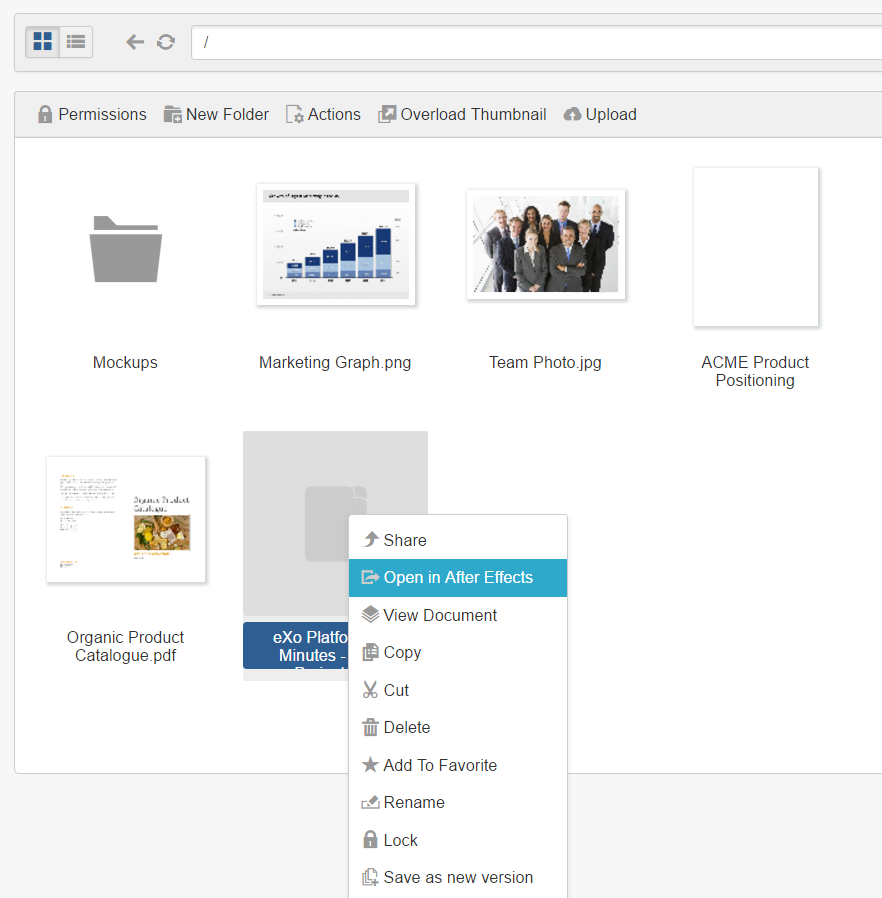
The Documents app provides an Open in Office feature for opening common Microsoft Office documents (i.e. Word, Excel and PowerPoint) stored inside eXo Platform without having to download them to your computer. With a click of a button, the document opens up in the respective Office app for editing.
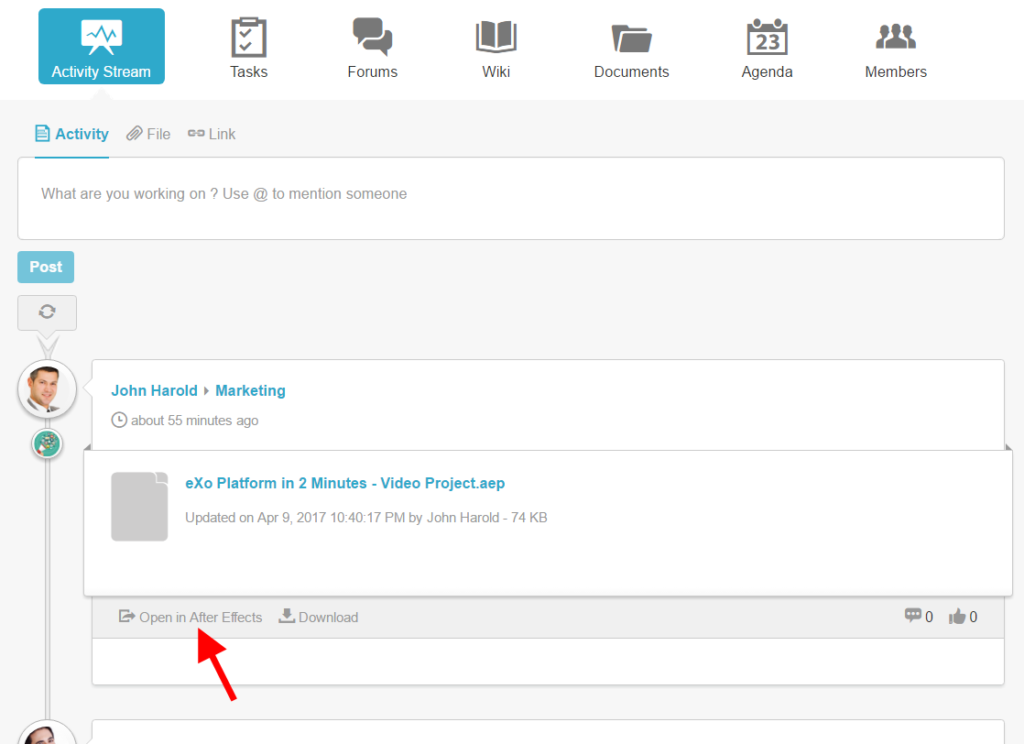
For example, clicking on Open in Word launches the document in your locally installed Microsoft Word app without downloading it. Saving your edits automatically creates a new version in eXo Platform and notifies your teammates.
As an admin, you can enable this feature for any other file formats that your organisation or team works with and needs to collaborate on.
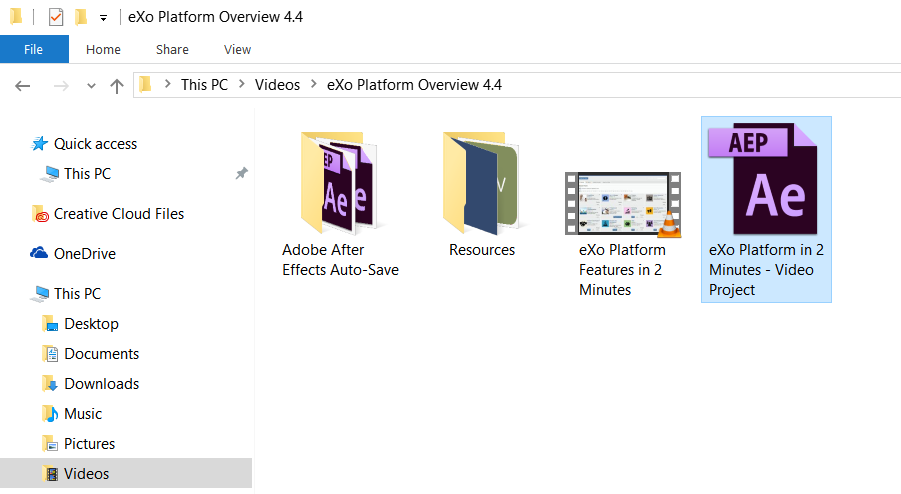
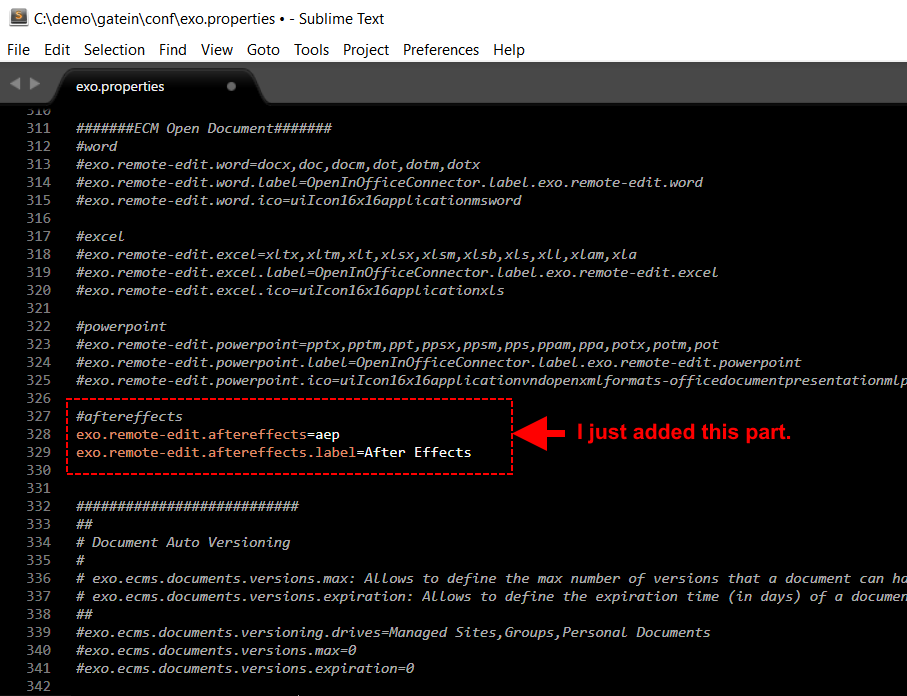
Let’s say that I work with my team on creating videos in Adobe After Effects and we need to share and collaborate on the project files using eXo Platform.
As an admin, I can edit (using any text editor) the platform’s configuration file called ‘exo.properties’ found under {your platform directory}\gatein\conf
In this text file, I will look for a section called ‘ECM Open Document’ and add these two lines:
exo.remote-edit.$CATEGORY=$SET_OF_FILETYPES exo.remove-edit.$CATEGORY.label=$LABEL
This is what I did:
Click on Finish. You will be prompted for your eXo Platform credentials. Enter them and you are good to go.
If you are using a Mac or Linux machine, I am sure there is a similar procedure. Just google how to map a network drive in your operating system if you do not already know how to do it.

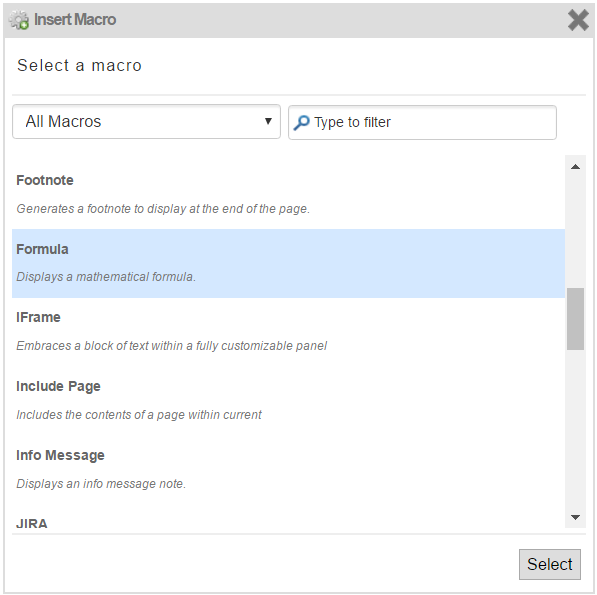
Wiki is a useful tool for creating, organising and sharing information pages. The use cases vary, ranging from policies, to procedures, guides and tutorials, plannings and roadmaps, meeting notes, specifications, documentation, papers and course materials, and the list goes on.
Wiki has a standard rich text editor allowing you create pages like these. This editor includes a feature called ‘macros’. Macros are pre-developed script-like tools that allow you to insert custom types of content (that would have otherwise required customisation) to your Wiki page with a couple of clicks. They can be built and many are already implemented out of the box in eXo Platform’s Wiki. These include:

This is the easiest one because you don’t have to. The eXo Platform mobile app follows a hybrid model whereby it displays the responsive web interface within a native mobile app shell. That means that your modifications are reflected automatically. You can read more about this in my previous article.
If you have any questions, feedback or insights to share about your experience of customising eXo Platform, please join the conversation in our online community forums.
( Your e-mail address will not be published)
I am a product marketing manager for enterprise software solutions at eXo Platform. My role involves supporting and leading marketing and operational activities for our digital collaboration platform. My contributions to this blog revolve around the exciting and fast-paced world of enterprise digital transformation, team collaboration, open-source technology and making the most out of eXo Platform.