- Jihed Chabbeh
- November 28, 2019
Step-by-step integration of eXo Platform SSO via SAML2 with Keycloak

Content
discover all the features and benefits
Setting up Keycloak
- Launch Keycloak (assuming that it would run on port 8080).
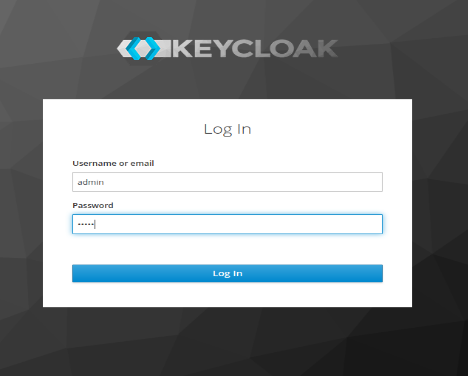
- Create ‘admin’ user and access to ‘administration console’.
- In Clients menu, add a new client.
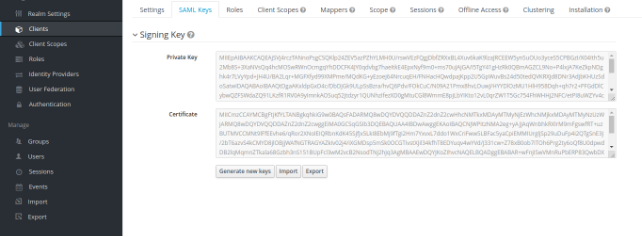
- After saving, export the SAML key (and place it under folder gatein/conf/saml2): SAML KEYS → EXPORT: add a key and store password (to be filled in later in picketlink-sp.xml) and keep Realm Certificate Alias as it is (default value: master).
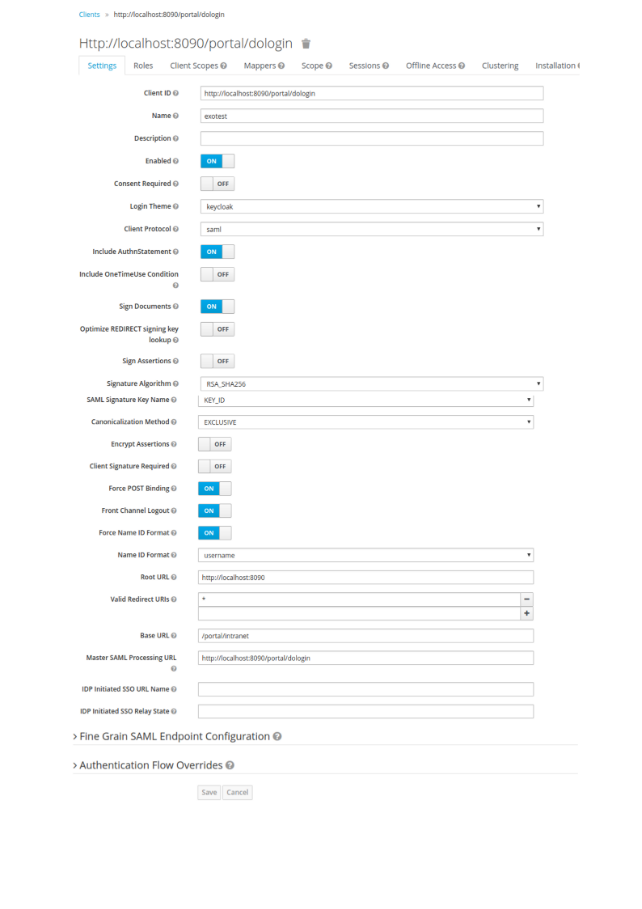
- Go to Settings, fill in the form as shown below and save.
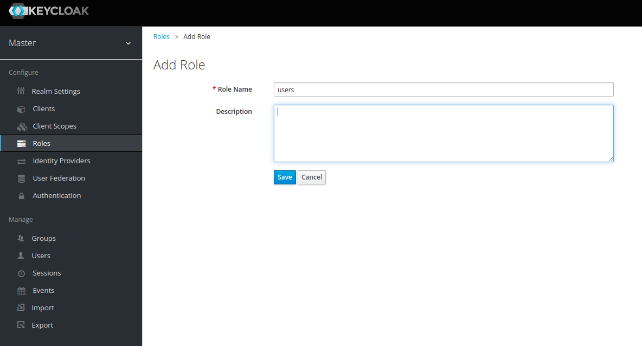
- Go to Roles and add roles that already exist in eXo Platform (roles to use: users, administrators, web-contributors and guests, in lowercase).
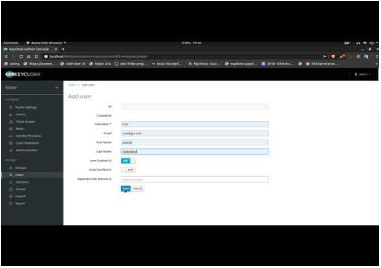
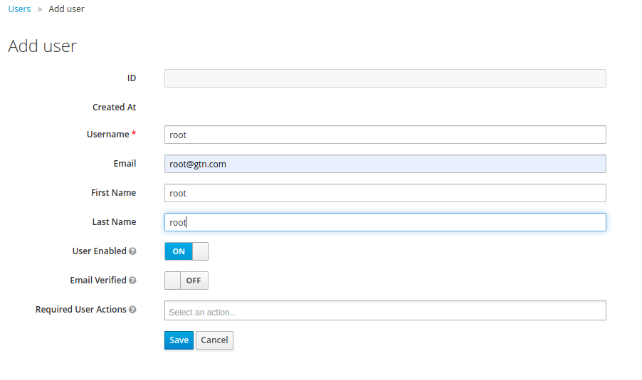
- Go to Users > Add user and add users that already exist in eXo Platform (same usernames).

Setting up eXo Platform
- Install exo-saml-addon:
- Open the file $EXO_HOME/gatein/conf/exo.properties and add the following properties (add them if they do not exist):
					<pre class="lang:default decode:true ">gatein.sso.enabled=true
gatein.sso.callback.enabled=${gatein.sso.enabled}
gatein.sso.login.module.enabled=${gatein.sso.enabled}
gatein.sso.login.module.class=org.gatein.sso.agent.login.SAML2IntegrationLoginModule
gatein.sso.filter.login.sso.url=/@@portal.container.name@@/dologin
gatein.sso.filter.initiatelogin.enabled=false
gatein.sso.valve.enabled=true
gatein.sso.saml.config.file=$EXO_HOME/gatein/conf/saml2/picketlink-sp.xml
gatein.sso.idp.host=localhost
#Keycloak instance
gatein.sso.idp.url=http://${gatein.sso.idp.host}:8080/auth/realms/master/protocol/saml
# eXo platform login URL
gatein.sso.sp.url=http://localhost:8090/portal/dologin
# WARNING: This bundled keystore is only for testing purposes. You should generate and use your own keystore!
gatein.sso.picketlink.keystore=$EXO_HOME/gatein/conf/saml2/jbid_test_keystore.jks
gatein.sso.valve.class=org.gatein.sso.saml.plugin.valve.ServiceProviderAuthenticator
gatein.sso.filter.logout.enabled=false
gatein.sso.filter.initiatelogin.enabled=false
</pre> - Copy the saml support libraries.
* Copy « jboss-security-spi-3.0.0.Final.jar » to $EXO_HOME/lib/
* Copy « sso-saml-plugin-5.2.2.jar » to $EXO_HOME/lib/ (For exo-saml 2.2.3 version, use « sso-saml-plugin-5.2.2.jar » )
** Edit the file $EXO_HOME/gatein/conf/saml2/picketlink-sp.xml
# Add the appropriate KeyStorePass, SigningKeyPass and SigningKeyAlias passwords.
- Start eXo Platform:
Verifying everything works well

- Create some users in Keycloak and eXo Platform for testing. The username ‘john’ in eXo Platform must be the same as the username ‘john’ in Keycloak. Also, make sure the Keycloak users have the ‘users’ role (to access eXo Platform).
- Now, access eXo Platform. You will be redirected to the Keycloak login page. After you are authenticated with your Keycloak username, you will get access to eXo Platform.
- When you log out from eXo Platform, you should be redirected to the Keycloak login page.
This guide was made with:
eXo Platform: 5.2.2 / 5.2.3
Keycloak: 6.0.1 / 7.0.1
exo-saml: 2.2.2 / 2.2.3
Please share with us your experience in applying this tutorial to your own applications and contact us if you have any questions or issues.
SPOILER ALERT
* These steps will no longer be needed from eXo Platform 5.2.5 (being released soon).
** From eXo Platform 5.2.5, these properties will be set in exo.properties.
tools and information

Related posts
- All
- eXo
- Digital workplace
- Employee engagement
- Open source
- Future of work
- Internal communication
- Collaboration
- News
- intranet
- workplace
- Knowledge management
- Employee experience
- Employee productivity
- onboarding
- Employee recognition
- Change management
- Cartoon
- Digital transformation
- Infographic
- Remote work
- Industry trends
- Product News
- Thought leadership
- Tips & Tricks
- Tutorial
- Uncategorized


Leave a Reply
( Your e-mail address will not be published)