- Walid Hamrouni
- November 8, 2018
Introducing the eXo Wallet Add-On Based on the Ethereum Blockchain for eXo Platform!
We are adding more digital workplace features to eXo Platform—with eXo Wallet, we provide a built-in digital wallet solution. This secure wallet is based on the Ethereum blockchain technology and allows any user of the eXo Platform solution to send and receive payments in any currency or utility token.
Ethereum is an open-source, public, blockchain-based decentralized platform used to deploy “smart contracts” and implement tokens through the ERC20 standard.
")
Content
On this blockchain platform, the tokens can represent assets, virtual shares, property, or any units of value we want to associate to them.
The smart contracts are computing protocols intended to facilitate, verify, or enforce the negotiation or performance of a contractual relationship. They allow the execution of trustworthy transactions without the involvement of a central third party. In addition, these transactions are all trackable and irreversible. Contracts provide various advantages such as superior security and lower transaction costs compared to traditional contracts.
With this new add-on for eXo Platform, we aim to popularize the use of blockchain at work. With personal wallets holding tokens, employees will be able to exchange among themselves or through shared wallets (such as funds dedicated to projects or initiatives) any kind of token, be it a known cryptocurrency or one custom-made and authorized for use by the organization that is using eXo Platform.
Let’s dive into eXo Wallet and see what it has to offer.
1. Initiating a New Wallet
After an administrator has installed and set up the eXo Wallet add-on, all authorized users will have their wallet application deployed to their user profiles.
In order to create a new wallet, you will need to go to My Profile > My Wallet. If you are allowed to use the app, you will see the following:

Click on Create new wallet and wait a few seconds while your wallet is generated.
Once your wallet is generated, you should see the following screen:
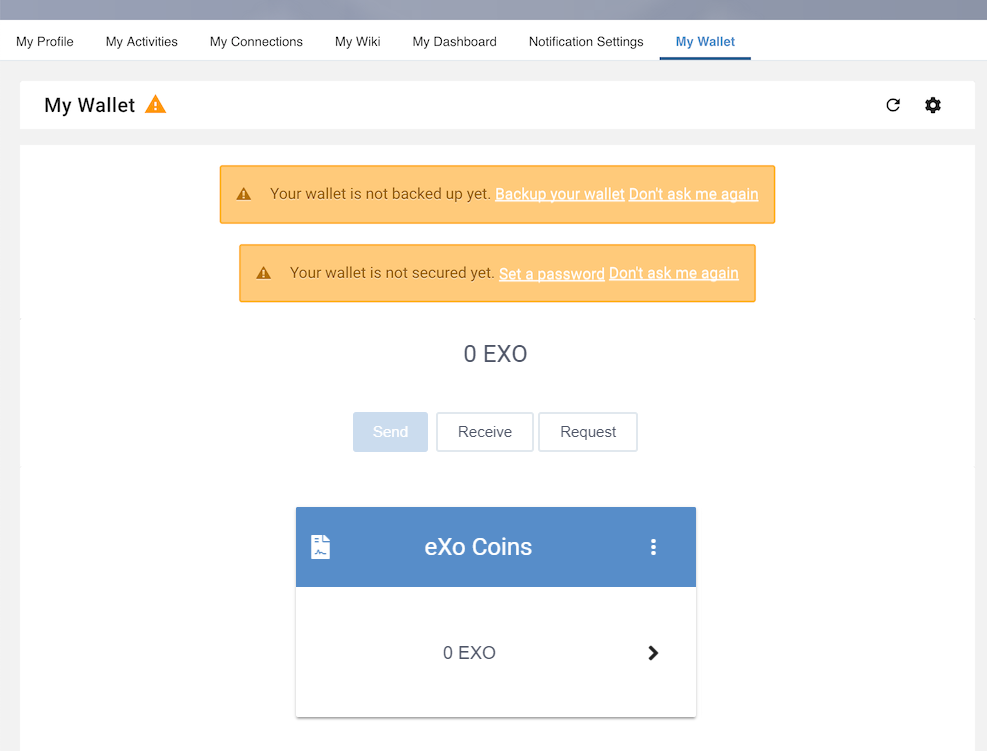
As said previously, administrators can deploy custom-made tokens or reference already-existing cryptocurrencies at their convenience. The eXo Coins in the example above are fictive tokens generated through a smart contract deployed by an administrator in the blockchain network. For the sake of this illustration, we will use these fictive eXo Coins as a unit of value to be exchanged between users.
First, note the two warning banners displayed when a wallet is initialized: one telling you to backup your wallet and one to protect it with a password.
2. Backing Up Your Wallet
At this stage, it is very important that you backup your wallet private key and keep it in a safe place. Without it, nobody, not even an administrator, will be able to restore it (and its funds) in case you ever lose access to your web browser. If this happens, your funds will be lost forever and will be unrecoverable.
Start by clicking on Backup your wallet:

A small popup will appear to explain to you why it is important to backup your wallet:

Once you’ve read the message, click on Display Private Key.
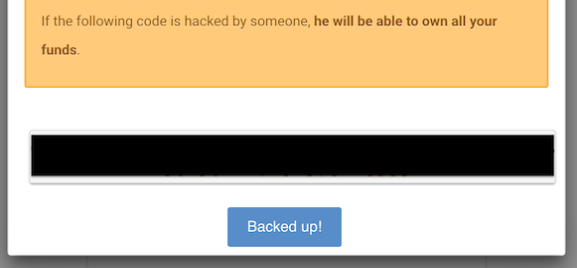
A string of characters should be displayed at the bottom (blacked out in the screenshot above). This string is your wallet’s private key, which allows you to import your wallet on another browser or machine, for example. It is important to not share it, as you may lose ownership of your wallet or your funds with no possibility of claiming ownership.
Click Backed up! to confirm that you have saved your private key in a safe place.
3. Set Your Wallet Password
This step is optional but critical if you want to properly secure access to your wallet. You must protect it with a password. If you don’t, anybody who gains access to your eXo Platform user account will also be able to use your wallet’s funds. Click on Set a password:

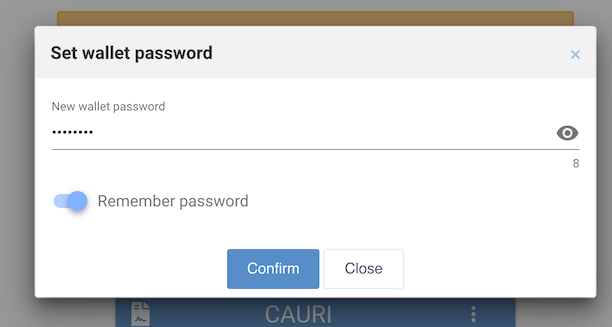
After this step you will need to enter your wallet password for every fund transfer you make. For convenience, you can tell it to remember your password so that you don’t have to enter it before every single transaction.
4. Wait for Initial Funds
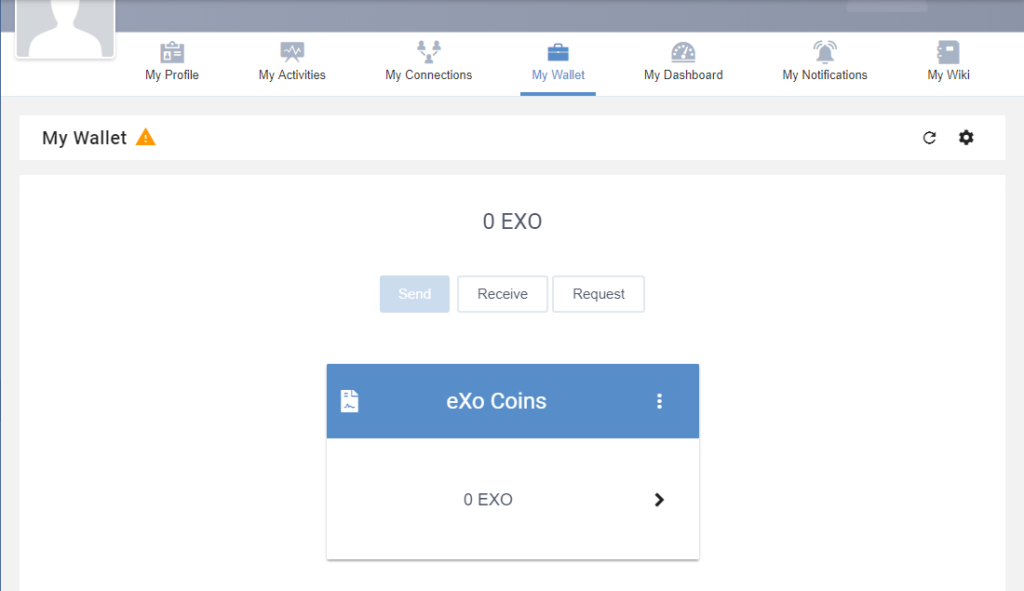
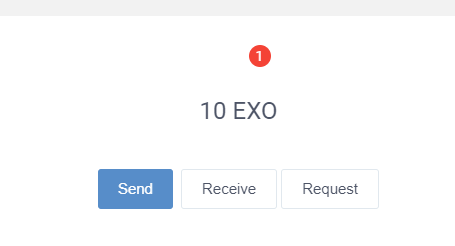
At this stage, your wallet is totally secured and ready for use! Initially, it will be empty (unless you are restoring an old/existing wallet), and look something like this:
The administrator will have received an alert by now informing him that your new wallet is ready and soon send you some tokens to get you started. When they do, you will receive this notification:
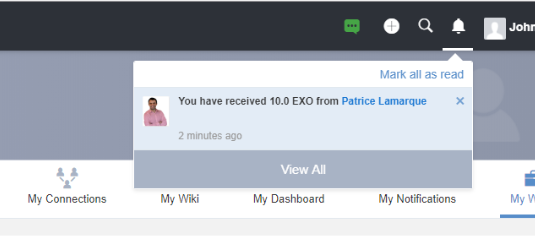
This means you’ve been granted 10 units of type eXo Coins. You are now able to send and receive eXo Coins with your brand-new wallet!
5. Sending and Receiving Tokens
Now that your wallet is activated, fully secured, and has some initial funds, let’s see what types of interactions it can facilitate.
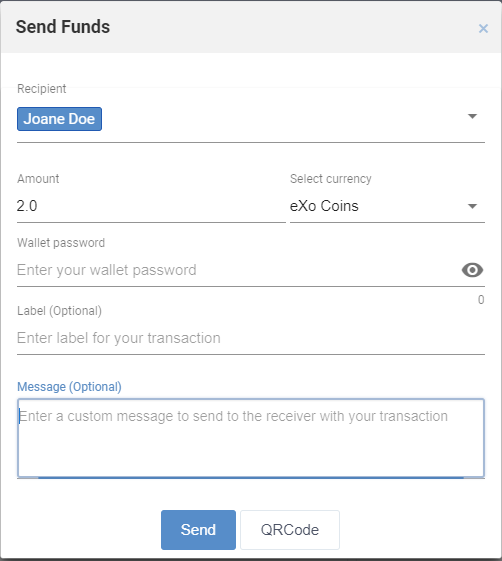
If you hit Send, a popup will appear with a form to fill to start your transaction.
After filling out your form, you will see that there is a pending transaction (see the red icon below indicating that there is one transaction in progress). This will last a few moments as the transaction needs to clear through the blockchain network.
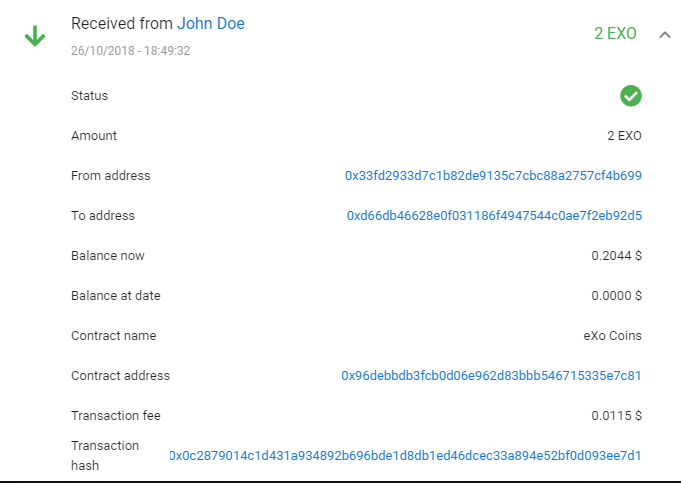
Once the transaction clears, your recipient will be notified that you sent coins:

The recipient can also verify transactions with all associated details through an easy-to-read interface (as well as yourself):
The Receive button on your wallet displays your public key as well as the QR code attached to your wallet:
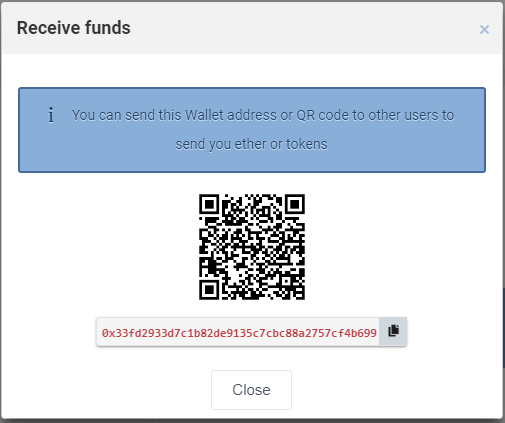
The public key is the public address of your wallet in the blockchain network. It’s like your bank account number: you can show it to someone who needs to send you funds. The QR code represents your public key in visual form and is convenient to scan using QR code-enabled apps.
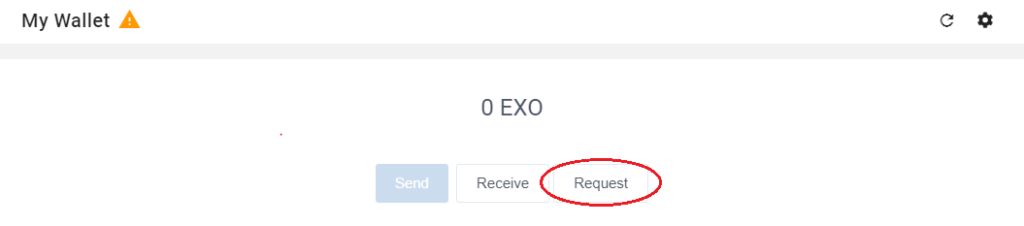
Now let’s say that one of your coworkers is in need of funds to initiate a project within the company. This colleague can easily request some funds from someone (for example, his manager) with the eXo Wallet as follows:
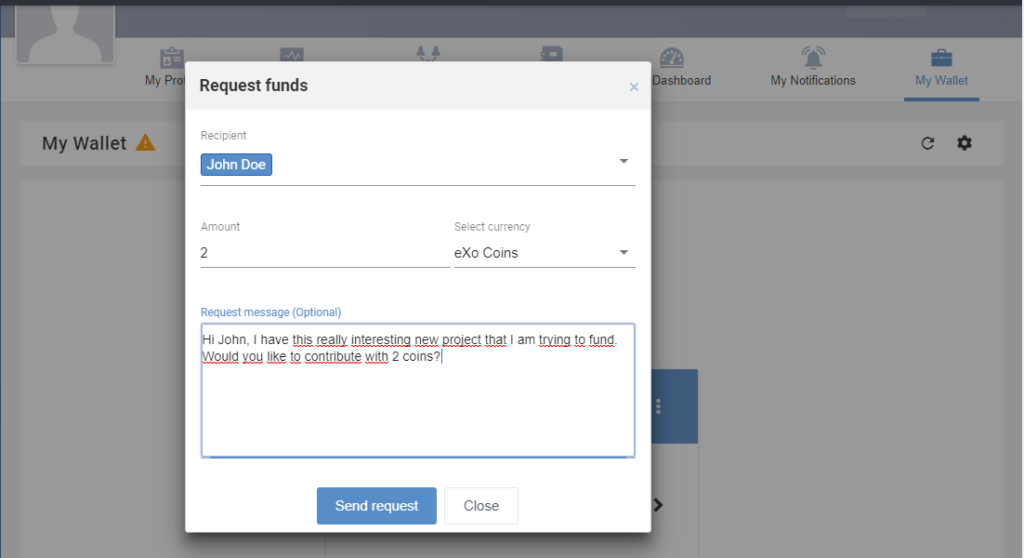
In this form you will be able to choose the recipient(s) of your request, indicate the amount you are asking for, and include an optional message perhaps explaining the reason you need those funds.
After the request is sent, your recipient will get a notification.

When they click on Accept, they will be redirected to their wallet and a popup will appear with the amount, the recipient of the transaction, as well as the currency fields automatically filled out. He’ll just have to enter his password and send you the requested amount:

After the requested tokens are sent, she will be notified as shown previously and will find the tokens in her wallet with the details of the transaction.
6. Space Wallet
The last notable feature we will present to you in this blog post is the space wallet. It functions the same way as a personal wallet except it is not meant for storing personal funds but rather funds that are dedicated to a project, a team, a cause, an initiative, etc. For example, you can use a space wallet to try to collect funds in order to prepare team-building events or perhaps create a space for a project you would like to start and see who would contribute through internal crowdfunding.
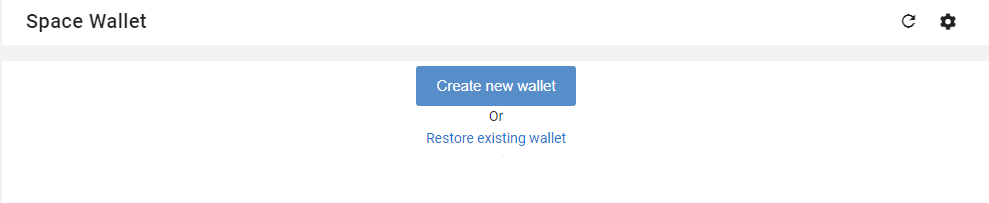
After the same creation process as a personal wallet (explained previously), your space wallet is ready for use:
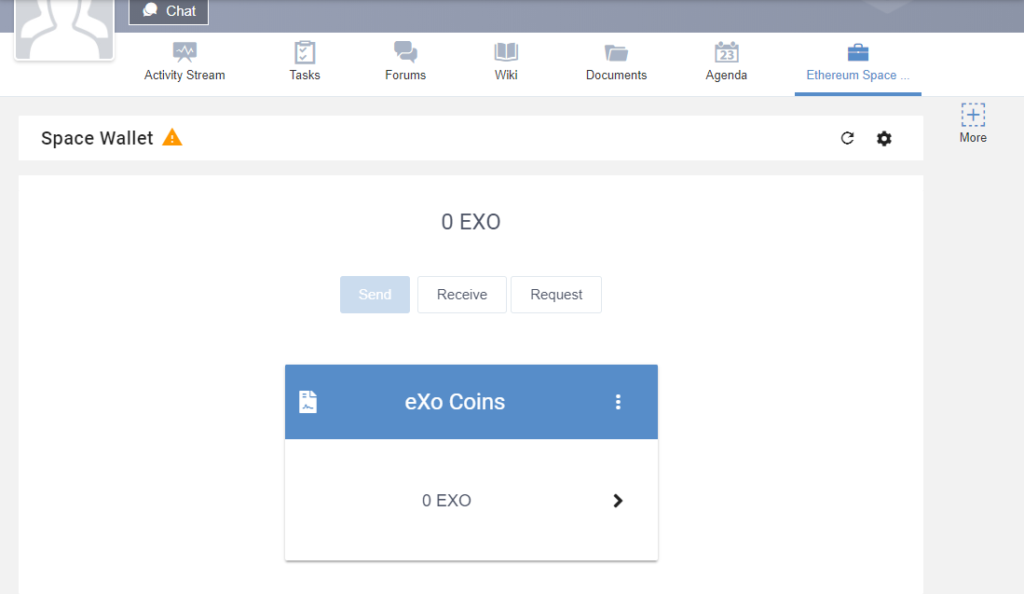
You can now start raising funds for your space using the Receive and Request buttons. They work the same way as explained previously with personal wallets.
7. How Can I Try it?
You can install the eXo Wallet add-on to your eXo Platform instance right away from the eXo Add-on center. As always, we welcome your feedback, questions, and requests, so contact us here if you have any.
eXo Platform 6 Free Datasheet
Download the eXo Platform 6 Datasheet and
discover all the features and benefits
discover all the features and benefits

I am a product marketing specialist and tech enthusiast. My role at eXo is to support marketing and operational activities for our digital collaboration tool. I will mainly blog about digital transformation, collaboration, open-source tech, and how to navigate through eXo platform.
Related posts
- All
- eXo
- Digital workplace
- Employee engagement
- Open source
- Future of work
- Internal communication
- Collaboration
- News
- intranet
- workplace
- Knowledge management
- Employee experience
- Employee productivity
- onboarding
- Employee recognition
- Change management
- Cartoon
- Digital transformation
- Infographic
- Remote work
- Industry trends
- Product News
- Thought leadership
- Tips & Tricks
- Tutorial
- Uncategorized

Leave a Reply
( Your e-mail address will not be published)
Connexion
0 Comments
Commentaires en ligne
Afficher tous les commentaires