Step-by-Step Guide to Integrate LinkedIn Connect with the eXo Platform Sign-In Mechanism

Content
I. Objective
1. Users can sign into your eXo Platform 4 website using their LinkedIn accounts.
2. The LinkedIn user profile can be imported into the eXo Platform user profile.
II. Prerequisites
- eXo Platform Extension
- JAAS Login modules
- Filter in java
- Filters in eXo
- The scribe API, Maven, and GIT
discover all the features and benefits
III. Steps
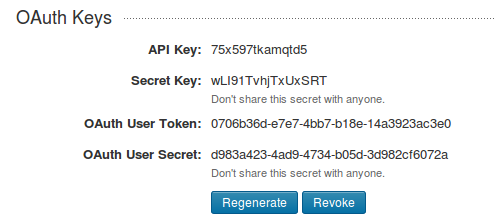
1. Obtain LinkedIn API key and secret key via the LinkedIn developer website.
2. Develop a LinkedIn OAuth component (.jar) in your own java project.
3. Deploy your component into eXo Platform
4. Develop a login module (.jar) in your java project.
5. Deploy and configure JAAS Realm to enable your login module.
1. Obtain LinkedIn API key and secret code.
– Sign in at http://developer.linkedin.com
– Click “API Keys”, in the drop-down menu under your name.
– Click “Add New Application” to launch the LinkedIn Application Wizard.
– Complete the wizard. Notice that in the Default Scope section, “r_emailaddress” should be checked.

2. Develop a LinkedIn OAuth component (.jar).
– Start your Maven project.
– Edit your pom.xml to add scribe dependency:
					<dependency>
	<groupId>org.scribe</groupId>
	<artifactId>scribe</artifactId>
	<version>1.3.5</version>
</dependency>
					import org.scribe.builder.ServiceBuilder;
import org.scribe.builder.api.LinkedInApi;
import org.scribe.model.OAuthRequest;
import org.scribe.model.Response;
import org.scribe.model.Token;
import org.scribe.model.Verb;
import org.scribe.model.Verifier;
import org.scribe.oauth.OAuthService;
The interconnection is explained here:
– http://developer.linkedin.com/documents/authentication
If you need to read more about Scribe API:
– http://developer.linkedin.com/thread/2239
– https://github.com/fernandezpablo85/scribe-java
– Write another class (called “filter” in this tutorial) that:
- Redirects users to the LinkedIn login page using the login url
- Redirects users to the login page on our website once the needed information has been retrieved
 Sample code for the filter
					public class OAuthLinkedinFilter implements org.exoplatform.web.filter.Filter{

	public void doFilter(ServletRequest request, ServletResponse response,FilterChain chain) throws IOException, ServletException {

	HttpServletRequest req = (HttpServletRequest)request;
    HttpServletResponse res = (HttpServletResponse)response;
    HttpSession session = req.getSession(true);
    LinkedinAuthHelper helper = new LinkedinAuthHelper();
    String code = request.getParameter("code");
    String stateRes = request.getParameter("state");
    String stateReq = (String)session.getAttribute("state");
    if(code == null ||  stateReq == null || stateRes == null || "".equals(code) || "".equals(stateReq) || "".equals(stateRes) || !stateRes.equals(stateReq)){
			session.setAttribute("state", helper.getStateToken());
			String loginUrl = helper.getLoginUrl();
			res.sendRedirect(loginUrl);
			return;
		}else if(code != null  && stateRes != null && stateReq != null && stateRes.equals(stateReq)){
      session.removeAttribute("state");
      String username = helper.getUsernameFromTokenCode(code);
      if(username != null){
          SecureRandom random = new SecureRandom();
          String password = new BigInteger(130, random).toString(32);
          session.setAttribute("oauth_username",username);
          session.setAttribute("oauth_password",password);
          res.sendRedirect("/portal/login?username="+username+"&password="+password);
          return;
      }
    }
}
3. Deploy your LinkedIn Auth component.
– After building your project, install jar to tomcat/lib.
– Declare the filter via an eXo Platform Extension. The filter will be declared in WEB-INF/conf/portal/configuration.xml, as in the following sample. (Note that the class name is org.exoplatform.community.oauth.linkedin.OAuthLinkedinFilter and the url is /linkedinAuth.)
					<?xml version="1.0" encoding="ISO-8859-1"?>
<configuration xmlns:xsi="http://www.w3.org/2001/XMLSchema-instance"
               xsi:schemaLocation="http://www.exoplaform.org/xml/ns/kernel_1_2.xsd http://www.exoplaform.org/xml/ns/kernel_1_2.xsd"
               xmlns="http://www.exoplaform.org/xml/ns/kernel_1_2.xsd">
  <external-component-plugins>


    <target-component>org.exoplatform.web.filter.ExtensibleFilter</target-component>
    <component-plugin>

      <name>Sample Filter Definition Plugin</name>

      <set-method>addFilterDefinitions</set-method>

      <type>org.exoplatform.web.filter.FilterDefinitionPlugin</type>
      <init-params>
        <object-param>
          <name>Sample Filter Definition</name>
          <object type="org.exoplatform.web.filter.FilterDefinition">

            <field name="filter">
              <object type="org.exoplatform.community.oauth.linkedin.OAuthLinkedinFilter"/>
            </field>


            <field name="patterns">
              <collection type="java.util.ArrayList" item-type="java.lang.String">
                <value>
                  <string>/linkedinAuth</string>
                </value>
              </collection>
            </field>
          </object>
        </object-param>
      </init-params>
    </component-plugin>
  </external-component-plugins>
</configuration>
FREE WHITE PAPER
for the Enterprise
FREE WHITE PAPER
for the Enterprise
4. Develop your login module.
– Write a login module that extends AbstractLoginModule.
See the code sample below:
					package org.exoplatform.community.service.sso;
public class ORGLoginModule extends AbstractLoginModule {

	public boolean login() throws LoginException {

    try {
			HttpServletRequest request = getCurrentHttpServletRequest();
			ExoContainer container = getContainer();
			HttpSession session = request.getSession(true);
			String username = null;
			String password = null;
			if(session != null) {
				if(session.getAttribute("oauth_username") != null) {
					 username = (String) session.getAttribute("oauth_username");
					 session.removeAttribute("oauth_username");
				}
				if(session.getAttribute("oauth_password") != null) {
					 password = (String) session.getAttribute("oauth_password");
					 session.removeAttribute("oauth_password");
				}
      }
			if(username != null){
				establishSecurityContext(container, username);
				if (log.isTraceEnabled()) {
					log.trace("Successfully established security context for user " + username);
				}
				return true;
			}
			return false;

    }catch (Exception e) {
		if (log.isTraceEnabled()) {
			log.trace("Exception in login module", e);
    }
    return false;
}

	protected void establishSecurityContext(ExoContainer container, String username) throws Exception {

		Authenticator authenticator = (Authenticator) container.getComponentInstanceOfType(Authenticator.class);
  	if (authenticator == null) {
			throw new LoginException("No Authenticator component found, check your configuration");
    }
    Identity identity = authenticator.createIdentity(username);
    sharedState.put("exo.security.identity", identity);
    sharedState.put("javax.security.auth.login.name", username);
    UsernameCredential usernameCredential = new UsernameCredential(username);
    subject.getPublicCredentials().add(usernameCredential);
    }
	}
5. Deploy and configure JAAS to enable your login module.
– After building your login module jar, install it to tomcat/lib
.– Configure to enable the module in tomcat/conf/jaas.conf. Your login module should be placed before other modules. In the following example, it is ORGLoginModule:
					gatein-domain {
	org.exoplatform.community.service.sso.ORGLoginModule required;
	org.gatein.sso.integration.SSODelegateLoginModule required
	enabled="#{gatein.sso.login.module.enabled}"
	delegateClassName="#{gatein.sso.login.module.class}"
	portalContainerName=portal
	realmName=gatein-domain
	password-stacking=useFirstPass;
	org.exoplatform.services.security.j2ee.TomcatLoginModule required
	portalContainerName=portal
	realmName=gatein-domain;
};
6. Test it.
– To check if the filter works, go to {your website}/portal/linkedInAuth
If the module is working, it will redirect you to a LinkedIn login page like this one:
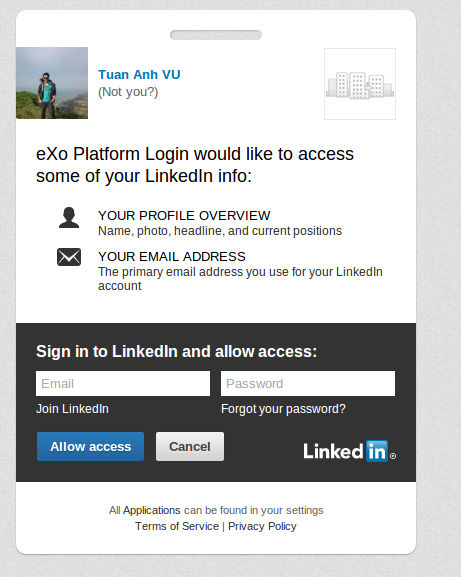
Once you are identified on LinkedIn and allow access, you will be redirected back to the website with the user data provided by LinkedIn. These data are formatted under json format in the following manner:
{“id”:”QuUeufSui4″,”lastName”:”Vu”,”emailAddress”:”anhvta@yahoo.com”,”firstName”:”Tuan Anh”}
Now, you can do whatever you want with these data.
See the mechanism in action by signing in into the community, and learn more about our add-ons and what you can do with eXo Platform 4.
Join the eXo Community if you have any questions or if you want more details on how we did it for Google+ and Facebook logins.
Get in Touch with our Experts
Get in Touch with our Experts
Learn How we Can Help Your Teams Collaborate and Get Things done

Related posts
- All
- eXo
- Digital workplace
- Employee engagement
- Open source
- Future of work
- Internal communication
- Collaboration
- News
- intranet
- workplace
- Knowledge management
- Employee experience
- Employee productivity
- onboarding
- Employee recognition
- Change management
- Cartoon
- Digital transformation
- Infographic
- Remote work
- Industry trends
- Product News
- Thought leadership
- Tips & Tricks
- Tutorial
- Uncategorized
Leave a Reply
( Your e-mail address will not be published)